Installing Java in Ubuntu 10.10

Today I installed Ubuntu 10.10 in my system. While installation, I found the repository for Java has been changed. For the installation of Java, I have executed these instruction. I hope same will work for you.

Open your terminal and execute the following instruction.

For adding new repository

$ sudo add-apt-repository ppa:sun-java-community-team/sun-java6

Then to update repository

$ sudo apt-get update

And to install Java, following instruction is executed

$ sudo apt-get install sun-java6-jdk

(To accept the configuration window, press TAB key to move the control)

Another Method:

Ignorante has suggested (in comment)  another instruction  to install Java in Ubuntu 10.10. It is a single line instruction and it  worked very well in my system.

$ sudo apt-get install openjdk-6-jdk

thank you, ignorante.

Installing Firefox 3.6 in Ubuntu 9.10

As Mozilla Firefox 3.6 has released two days before, we can see the additional feathers here. As Ubuntu 9.10 provide Firefox 3.5 to be default, we can update it to Firefox 3.6 by installing it. For instillation, we have three simple steps:

1. Key Request

$ sudo add-apt-repository ppa:ubuntu-mozilla-daily/ppa

2. Source List Updation

$ sudo apt-get update

3. Firefox Installation

$ sudo apt-get install firefox-3.6

Bootsplash and Login Screen as Desktop Background in Ubuntu

Today I tried wallpaper_daemon, I liked it. It make the desktop, bootslash, and login screen to be same. In running mode of the script, if we change the background of the desktop, it will change the background of bootspash and login screen to be same. And after stopping(ctrl+c) the script if we change the desktop background, there will be no change on other backgrounds.

To get the effect, here are some simple steps to follow:

Step 1:

Download the script file from here

Step 2:

Extract the wallpaper_daemon.py

Step 3:

The script is depend on the imagemagik, so install it by typing below instruction on terminal
sudo apt-get install imagemagick

Step 4:

In terminal change directory location where you had extracted the wallpaper_daemon.py. And the install the script by typing
./wallpaper_daemon.py –install

Step 5:

Add wallpaper_daemon.py to startup programms from
System > Preferences > Startup Application

Step 6:

Restart the system

Step 7:

Now it is time to see the effect, change the background of desktop.

Step 8:

In terminal type
sudo xsplash
which will show you bootsflash, and to come out from there press ESC key.

If you want to remove the effect. Then steps goes like this,

step 1:

Remove wallpaper_daemon.py from the startup programs

Step 2:

Extract your backup file located at /usr/share/images/xsplash

Step 3:

Copy bg_2560x1600.jpg from the extracted drectory and replace it into /usr/share/images/xsplash

Step 4:

Restart the system

Referred From: http://gnome-look.org/content/show.php?content=114984

MySQL GUI Tools in Ubuntu 9.10

Previously I had post on, MySQL in Ububtu which was useful for some of the Ubuntu user. Here I am providing you some easy steps to install MySQL GUI Tools in Ubuntu. As most of the MySQL user know that dev provides MySQL GUI Tools, which makes easy to operate database. To install MySQL GUI Tools, here are some simple instruction to be executed in terminal.

Step 1:

$ sudo /etc/init.d/mysql start

This will start the the mysql. If you have not installed MySQL in your system, please refer my post Here.

Step 2:

$ sudo tar –directory=/opt -xzvf mysql-gui-tools-5.0r12-linux-i386.tar.gz

This instruction will will download and unzip all the required file in /opt/mysql-gui-tools-5.0/

Step 3 :

$ /opt/mysql-gui-tools-5.0/mysql-administrator

This will open MySql Administator window. Here we can operate database graphically. If you want to run some query in MySQL Query Browser give following instruction in terminal.

$ /opt/mysql-gui-tools-5.0/mysql-query-browser

This application  works very well in my system but, I am facing some resolution problem. So that I was unable to open MySQL Administrator window exact size(appearing larger in height), but when I click on the window it is shifting me to down which make the work possible. I hope you will not find same problem.

One of my reader(mike) suggest me this instruction:

$ sudo apt-get install mysql-admin mysql-query-browser

I tried it, works better than above one. So, even I suggest you to work follow this instruction. Thank you mike.

Windows Applications in Ubuntu

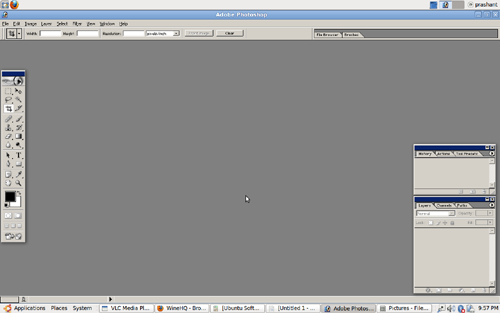
As GIMP is not much user friendly as photoshop (in my opinion), for advance editing I usually use Photoshop only. So,even being a Ubuntu user sometime i used to switch to windows to use Photoshop.But as I came to know about Wine, it’s really make my mind swing as it is like a real Red Wine. After installing Wine I am using photoshop in Ubuntu only. And apart from Photoshop there are thousand of other Windows application that is supported in Ubuntu, which you can search in http://appdb.winehq.org. Apart from Photoshop i am using Youtubedownloader, Macromedia dreamweaver 8, BitTorrent. And the main thing is, it works fine.

Here are the steps that you need to follow while installing wine in Ubuntu 10.

Step 1:

Go to Applications > Ubuntu Software Center

Step 2:

Search for ‘Wine’ in Software Center window; Wine Microsoft Windows Compatible Layer appears

Step 3:

DblClick Wine Microsoft Windows Compatible Layer; Then click on Install button.
And here you will get intallation of Wine.

Now Install the required windows application in ubuntu. But I suggest, before installation please check the application in http://appdb.winehq.orgwhether it is supported in Ubuntu or not.

So, Enjoy Windows application in Ubuntu.

wine

Installing MySQL in Ubuntu 9.10

As I begin to import my project into Ubuntu 9.10, I had to install MySQL too. Just at that time I realise, why don’t I publish this instruction for you all. At least, it will help some body. I hope you will be among that somebody.

For Installation and use MySQL you have to give some instruction in terminal:

Step 1:

sudo apt-get install mysql-server

This will install the latest MySQL-server into your machine.

Step 2:

sudo /etc/init.d/mysql start

Which will start the MySQL server.

Step 3:

mysql -u root -p

This instruction will ask you the MySql server that you have entered during installation.

Step 4:

create database db_test

This instruction will create a new database “db_test”

Step 5:

use db_test

which will let you inside the database.

Now use MySQL Query to work with it n Enjoy.

Installing Java in Ubuntu 9.10

As I did upgrade my operating system to Ubuntu 9.10, i found that the installation of Java became little easer. Previously in 9.04, I had to edit sources.list but this time directly update of the repository works.

For installation, Just i have to update my repository by

$ sudo apt-get update

Then I mapped the dependencies

$ sudo apt-get -f install

And just we need to install Java with following command

$ sudo apt-get install sun-java6-jre sun-java6-jdk sun-java6-plugin

(And to accept the configuration window, press TAB key to move the control)

VLC player installation in Ubuntu 9.10

As we all knows, VLC media player is the best media player for Ubuntu, which support almost media format. The installation method of VLC media player in new Ubuntu 9.10, I found it to be little changed. Now we have to install the trusted key and the after repository, we do have to install it. Here are the certain steps that work in my system:

Step 1:

$ sudo apt-key adv –recv-keys –keyserver keyserver.ubuntu.com 7613768D

This will install the trusted key for VLC.

Step 2:

$ sudo gedit /etc/apt/sources.list

Opens the repository file.

Step 3:

Add these two repository links and save in it.

deb http://ppa.launchpad.net/c-korn/vlc/ubuntu jaunty main
deb-src http://ppa.launchpad.net/c-korn/vlc/ubuntu jaunty main

Step 4:

$ sudo apt-get update

to update the repository.

Step 5:

$ sudo apt-get install vlc

To install the VLC player…
Step

Installing Java 6 in Ubuntu 9.04

Right now I am using ubuntu 9.04 linux, to forget that expensive, usafe and slow experience. For insatalling java in Ubuntu 9.04, I do have to make come changes and followed some instruction. So here is those steps that i had followed to install java in Ubuntu 9.04.

Step 1:

Open terminal and run

$ sudo gedit /etc/apt/sources.list

Step 2:

sources.list file will get open.

Check whether there is given repository link or not, if not then add these lines at the end of the file.

deb http://us.archive.ubuntu.com/ubuntu dapper main restricted

deb http://us.archive.ubuntu.com/ubuntu dapper universe multiverse

Step 3:

After closing sources.list with save, we have to update it’s repository.For that run:

$ sudo apt-get update

Step 4:

Now we are about to install Java 6, But before install we have to map the dependencies with this instruction

$ sudo apt-get -f install

Step 5:

Finally, we have to install Java with this instruction

$ sudo apt-get install sun-java6-jre sun-java6-jdk sun-java6-plugin

(If you are beginner in ubuntu, you might not get idea to click <Ok> which you will get on configure window. For that you have to use TAB button and then ENTER>

Step 6:

Verification of Java installation

$ java -version

This instruction display the installed version of the Java.